
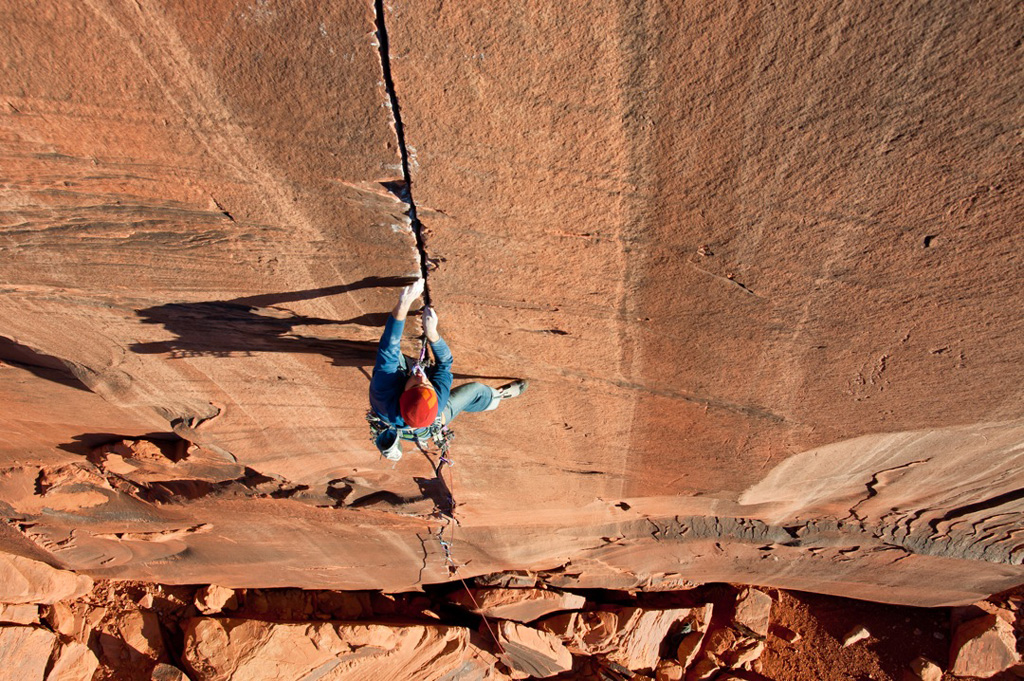
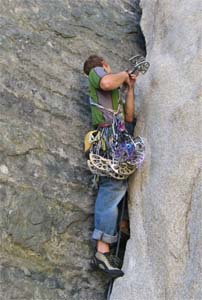
How to climb cracks? There are several climbing techniques, depending on the size and shape of the crack. We want to tell you about this in this article.
1. Work of hands
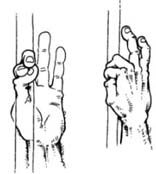
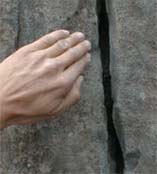
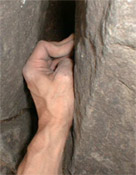
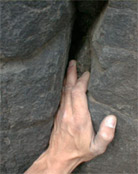
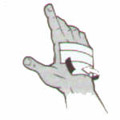
1.1 Finger gap.
The little finger and ring finger get stuck in very thin cracks or index and middle fingers. You need to feel the narrowing in the crack, place your hand slightly higher and press down so that your fingers are wedged. To wedge even more, turn your palm towards your thumb.
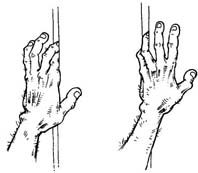
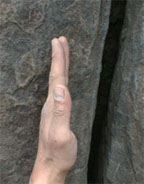
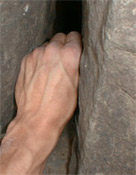
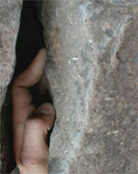
1.2 Slightly wider cracks.
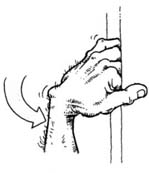

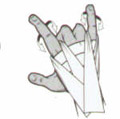
If the crack gets a little wider, you need to turn your thumb down and wedge your index and middle fingers.
Note how the fingers inside the crack are pressed against each other. Twisting increases the wedge.
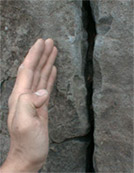
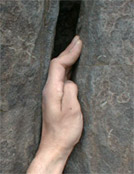
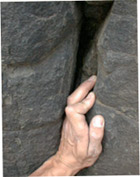
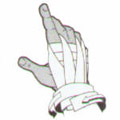
If the gap is a little wider and a thumb fits in there, you can use a wedging as shown in the last picture (pay attention to the second picture – with this arrangement of fingers in the crack, additional twisting to the left will allow you to secure it even more):
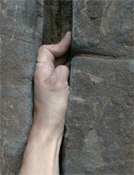
1.3 Arm gap.
Most often, in such gaps, a counter-support of the fingers and hand on the opposite walls is used.
1.4 Palm gap.
Working in fairly wide cracks, where the palm almost completely fits horizontally, looks like this:
The “upper” hand is inserted higher along the course, the thumb is pointed down, and the palm is slightly bent into a “boat”. Then the palm is twisted a little for better wedging.
Then the “lower” hand is inserted, with the thumb pointing up, and also wedgedIt is twisted out.

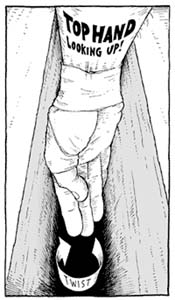
As practice shows, it is more convenient to decide in advance which hand will be the “upper” (leading) one and climb without changing their relative position. In addition, it will be safer if you do not pull your hands out of the crack. Here, as they say, the deeper, the safer.
Usually, if the crack turns to the left, then the “upper” hand will be the left one and vice versa. In the inner corners, it is better to position yourself as shown in the picture. In addition, the deeper you insert your “upper” hand into the crack, the more you will be turned away from the crack to the side, this will somewhat limit its visual inspection, but will allow you to gain a better foothold.
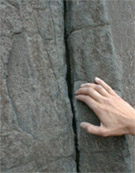
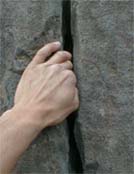
1.5 Gap for a fist.
A counter support or jamming of the fist is used.
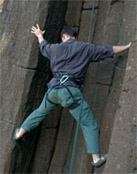
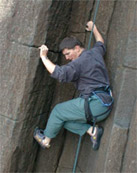
1.6 Complex cracks.
There are difficult cases – neither here nor there. Then you have to stick your fingers deep into the crack and try to combine techniques.
In the first picture you can see that, at first glance, the crack is too wide to wedge your fingers, but also too narrow for your hands. But, as you can see in the second picture, you just need to stick your fingers in deeper, there was a narrow spot where you can get a good grip.
Here you can see how a small protrusion inside the crack is used. Despite the fact that the ledge is sloping, with the help of the counter-stop of the knuckles against the walls of the crack, you can hold on to it well.
 |
 |
 |
You can use hidden vertical tabs in the same way.
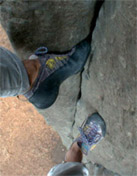
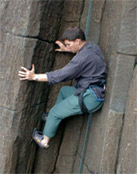
2. Footwork.
The ability to place your feet in a crack is no less important than the ability to wedge your hands.
Once you have wedge your hands well, you need to place your foot over the narrowing in the crack and turn your knee a little.
Twisting your knee inward will allow you to shift your center of gravity to your legs.
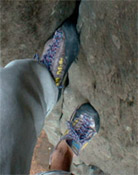
When the crack becomes a little wider, you can use additional friction of the sides of the rock on the edges cracks.
3. Spacers
 |
 |
 |
Spreaders can be used both for climbing and for stopping to rest or organize a belay point.
 4. Climbing in a drop-off position.
When climbing in a drop-off position, it is very important to choose the height of your foot placement. If you place your feet too high, you will have to put a lot of weight on your arms to stay on the wall. On the other hand, if you place your feet too low, you will not have a counter-support and you will slip.
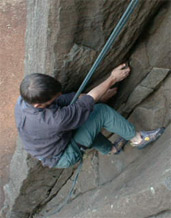
5. Setting up belay points.
You should not place the belay point as high as possible. It is better to jam your “upper hand” well and place the point slightly below or at waist level. Then you can take a break and maybe even take one of your hands out to give it a little rest.
Then, when you start moving, be careful not to catch on the set point.
When working in the inner corners, it is convenient to move all the equipment to one of the sides.
6. Hand wrapping.
There are many hand wrapping techniques to protect your hands when crack climbing.
 |
 |
 |
 |
 |
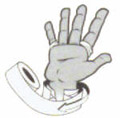 |
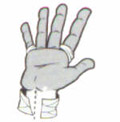
1. Apply three strips of tape (overlapping) to the back of your hand. Make sure the tape covers your knuckles.
2. Wrap your fingers as follows: start from the back of your hand, place the tape behind your index finger and return to where you started wrapping. In the opposite direction, move the tape along the already glued end of the tape. Do the same with the little finger. And then repeat the procedure for the second time.
3. Secure the resulting “glove” with several turns of the tape around the joint of your hand.
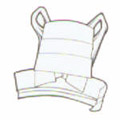
4. To remove the “glove”, simply carefully cut it from the inside of the hand.
5. Save the “glove” for future use.
6. You can re-fix the “glove” with a few turns of the plaster.
Source: alp.org.ua